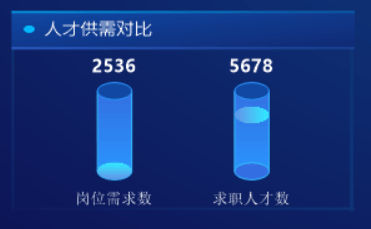
圆柱图(卡片三)
效果如:

把仪表的Maximum值改为10000。
1、Rectangle
| 属性 | 值 | 说明 |
| 布局-》CenterPointX | 0.3 | |
| 布局-》CenterPointY | 0.6 | |
| 布局-》Height | -0.4 | |
| 布局-》Width | 10 | |
| 属性变更-》Border-》Color | 49, 187, 254 | |
| 属性变更-》Filling-》Color | 51, 111, 226 | |
| 属性变更-》Filling-》Color2 | 41, 148, 253 | |
| 属性变更-》Filling-》BushType | Gradient | |
| 属性变更-》Gradient-》Direction | Vertical |
2、Ellipse
| 属性 | 值 | 说明 |
| 布局-》CenterPointX | 0.3 | |
| 布局-》CenterPointY | 0.4 | |
| 布局-》Height | 5 | |
| 布局-》Width | 10 | |
| 属性变更-》Border-》Color | 41, 148, 253 | |
| 属性变更-》Filling-》Color | 16, 72, 164 |
3、Ellipse
| 属性 | 值 | 说明 |
| 布局-》CenterPointX | 0.3 | |
| 布局-》CenterPointY | 0.8 | |
| 布局-》Height | 5 | |
| 布局-》Width | 10 | |
| 属性变更-》Border-》Color | 49, 187, 254 | |
| 属性变更-》Filling-》Color | 51, 111, 226 |
4、Caption
| 属性 | 值 | 说明 |
| 布局-》CenterPointX | 0.3 | |
| 布局-》CenterPointY | 0.95 | |
| 属性变更-》Color | White | |
| 属性变更-》Text | 岗位需求数 |
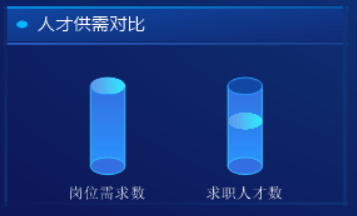
由于Decorators 装饰件都达不到显示为指定大小的椭圆形效果,所以这里直接给指针添加图片。设计一张图片,如:

然后把主指针隐藏改为显示,接着到仪表属性属性变更-》CustomImage-》Image添加上面的图片,然后设置指针属性为:
| 属性 | 值 | 说明 |
| 属性变更-》Pointer-》Length | 10 | |
| 属性变更-》Pointer-》Offset | 25 | |
| 属性变更-》Pointer-》ValueFactor | 0.4 | |
| 属性变更-》Pointer-》ValueOffset | 2000 | |
| 属性变更-》Pointer-》SweepTime | 3 | |
| 属性变更-》CustomImage-》KeepAspectRatio | False |
设置完成后效果为:

注意什上图没有显示具体的数量。由于为了配合设计图形,指针的值实际是变形了的,注意上面属性设置里的ValueFactor和ValueOffset,如果直接使用装饰件里的SingleLabel 显示数量,实际显示值的计算会比较麻烦。所以干脆就另外添加一个线性仪表用于数量的显示了。
添加一空白的线性仪表,属性设置为:
| 属性 | 值 | 说明 |
| 属性变更-》Orientation | Vertical | 指针按垂直方向运动 |
| 行为-》AxisLength | 0.25 | |
| 行为-》AxisStart | 0.7 | |
| 行为-》BaseFactor | 0.25 | |
| 行为-》BaseOrigin | 0.03 | |
| 行为-》IsReversed | True | 倒转最小值和最大值的起始位置 |
| 行为-》Maximum | 9999 | 最大值和最小值根据自己需要设置 |
| 属性变更-》Pointer-》Visible | False |
仪表的Decorators 装饰件添加一个SingleLabel ,属性设置:
| 属性 | 值 | 说明 |
| 布局-》Location | 30 | |
| 属性变更-》Color | White | |
| 属性变更-》Font | 微软雅黑, 10.5pt, style=Bold | |
| 属性变更-》Format | 0 | |
| 行为-》PointerIndex | 100 | |
| 行为-》Position | 0.28 |
复制上面的SingleLabel ,把布局-》Location改为70,然后绑定到副指针即可。